
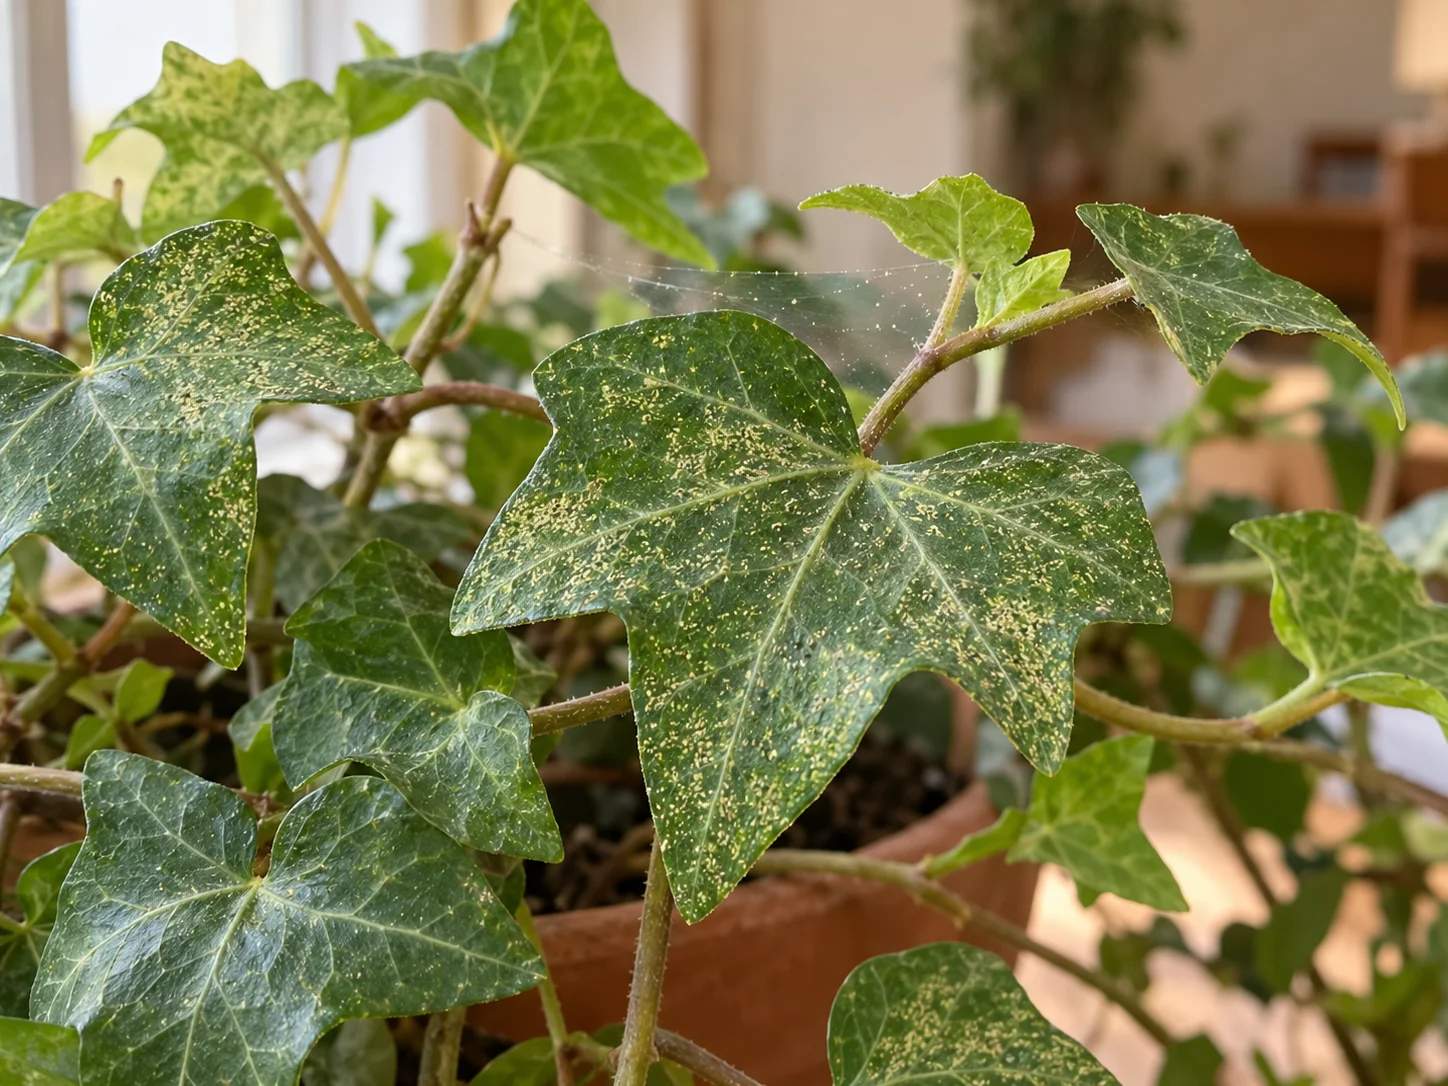
Confirm the pest before treating the plant
If you find living spider mites on a houseplant, separate it from neighboring plants, inspect the leaf undersides and remove mites with water where the plant tolerates washing. Follow with repeated checks; if further treatment is needed, choose an option suitable for the pest, plant and indoor use in your location. One rinse is not proof that the infestation has ended.
A yellow leaf or a thread of silk alone does not confirm spider mites. Check the pattern of damage and look for moving mites, eggs or shed skins. If the whole plant is yellowing without these signs, start with our guide to yellow houseplant leaves rather than applying a pest treatment on suspicion.
What spider mites and their damage look like
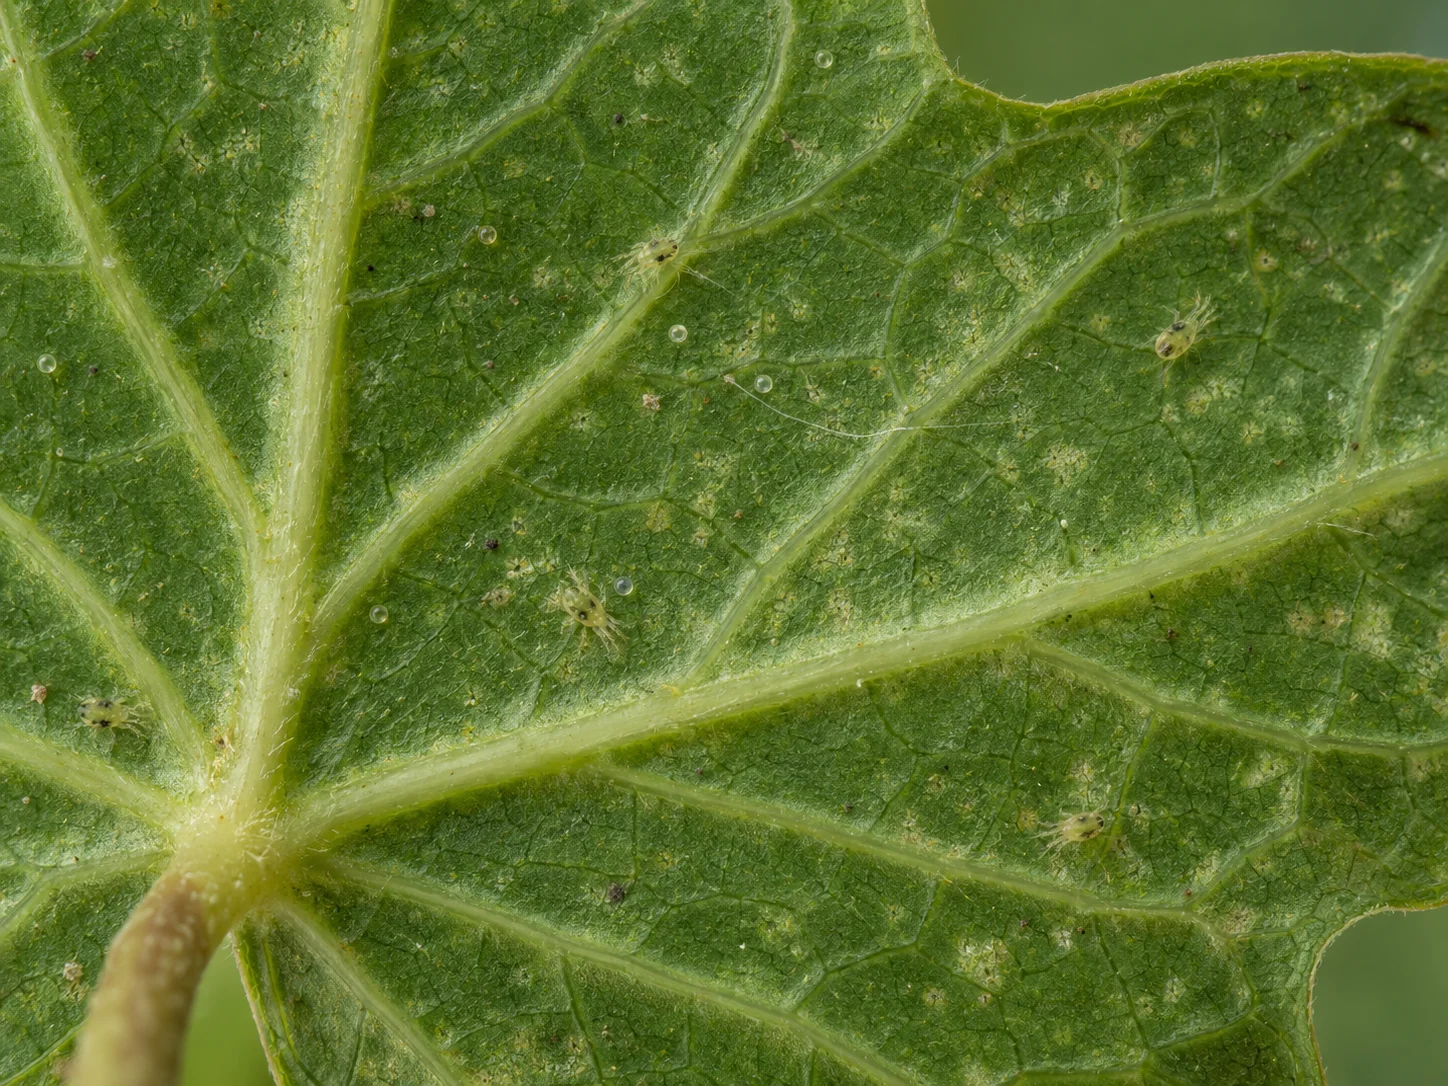
Early feeding often appears as many tiny pale dots across a leaf, not one sharply defined brown spot. As damage increases, foliage may look mottled, dull or bronzed. Heavily affected leaves can dry and fall. Fine silk can develop around leaf undersides, petioles and growing tips when populations build.
The common two-spotted spider mite is typically about 0.5 mm long, roughly 0.02 inch. Many are pale yellow-green with two darker patches, rather than the bright red color suggested by their name. A hand lens around 10× makes inspection much easier.
Check more than one leaf. Turn over older damaged leaves and compare them with newer growth. Mites are not the only cause of stippling, and several plant problems can occur together. Dust, dried spray deposits or a web left by a larger spider need a closer look before you decide what to do.
A white-paper check can help you find moving mites
Hold a sheet of white paper beneath a suspect leaf and gently tap the leaf over it. Watch for tiny moving specks, then use magnification if available. Repeat with leaves from different parts of the plant. A negative check on one leaf does not rule out a small population.
Do not identify every moving speck as a harmful mite. Predatory mites and other small organisms also exist. Look at the leaf damage, where the organisms were found and their appearance together. If you still cannot distinguish the pest, seek help from a local plant clinic or extension service before buying a treatment.
Why they keep returning to the same windowsill
Warm, dry conditions favor troublesome populations, particularly when plants are already water-stressed. Heating vents, hot windows and dusty foliage can create a difficult spot for a susceptible plant. The relevant conditions can occur in any month in a heated home, so a northern autumn calendar is not a worldwide rule.
New plants can bring pests into a collection, while an established neighboring plant can act as a continuing source. Inspect nearby foliage and plants whose leaves touch. Replacing one plant without checking its neighbors may leave the real source in place.
Correct the growing conditions without soaking the roots. A plant with damaged leaves does not automatically need more water. Our guide to how often to water houseplants explains how to judge moisture in the pot separately from dry air around the leaves.
Wash the leaves without creating a waterlogged pot
Move the affected plant away from the rest of the collection before handling it. If its leaves and structure tolerate washing, use a gentle stream of water to dislodge mites, paying particular attention to the undersides. Support delicate foliage and prevent a heavy stream from breaking stems.
Keep unnecessary water out of an already wet pot and allow drainage afterward. A damp soft cloth can help clean sturdy, accessible leaves, but avoid dragging one dirty cloth across the whole collection. Wash your hands and clean the immediate work area after handling infested plants.
Remove a limited amount of badly damaged or heavily infested foliage where practical. Do not strip a weak plant of all its leaves in an attempt to remove every mite. If the infestation is overwhelming and repeated management is unsuccessful, disposing of the plant may protect the rest of the collection.
Misting and humidity are not a complete treatment
Improving an excessively hot, dry location can reduce favorable conditions, but occasional misting does not reliably eliminate mites and eggs. Nor does a humidifier remove the population already feeding on the leaves.
Match humidity and airflow to the plant. Avoid enclosing an unfamiliar plant in a wet plastic bag as a universal cure: heat buildup and prolonged wetness can create additional problems. Washing foliage to remove mites is a deliberate action; keeping it permanently wet is a different practice.
If you need a product, check the use before the brand
Insecticidal soaps and horticultural oils can help against spider mites when the selected product is labeled for that pest, your plant and indoor use. Availability and permitted uses differ between countries. A garden product approved outdoors is not automatically suitable for a living room or an edible herb.
These contact treatments need to reach the mites, including those beneath leaves. Follow the label for dilution, coverage and any repeat applications. Test a small area as directed before treating the whole plant, especially with sensitive, hairy or wax-coated foliage. Avoid treating a heat-stressed or drought-stressed plant.
Dishwashing liquid is not a substitute for a formulated insecticidal soap, and homemade mixtures can injure leaves. Do not combine oils, soaps and other pesticides in an improvised stronger mix. Keep people and animals away during application and observe all label precautions and re-entry instructions.
Predatory mites need the right setting
Predatory mites are used in protected cultivation, but a sachet is not an automatic fix for every apartment. The predator species, humidity, temperature, pest population and any recent pesticide use affect the outcome.
Before ordering live predators, ask the supplier whether they suit your actual indoor conditions and the mite you have identified. A dry open room differs from a managed grow cabinet. Do not release predators immediately after applying a product without checking compatibility.
Measure progress on new damage, not old leaf scars
Photograph a few marked leaves before treatment and record where you found living mites. Recheck those places and newer growth over the following days, continuing the treatment schedule specified for any product used. Existing pale feeding scars will not turn green again.
Improvement means fewer live mites and no continuing spread of fresh damage. If webbing and feeding continue, revisit coverage, neighboring plants and identification rather than immediately increasing the dose. Tiny flies rising from the potting mix point to a different investigation: see fungus gnats in houseplants.
FAQ
Frequently asked questions
Yes. Fine feeding speckles and mites on leaf undersides can appear before obvious webbing. Use magnification and inspect several leaves.
No. Common two-spotted spider mites are often pale yellow-green with darker patches. Their color changes with life stage and conditions.
Washing can reduce the population, but does not prove that all mites and eggs are gone. Repeat inspections and any further treatment according to the plant's tolerance and product instructions.
Existing feeding scars generally remain. Judge improvement by fewer live mites and healthy new growth rather than expecting old pale marks to disappear.
Avoid homemade detergent sprays. If a product is needed, use a formulated treatment labeled for spider mites, your plant and indoor use in your location.